
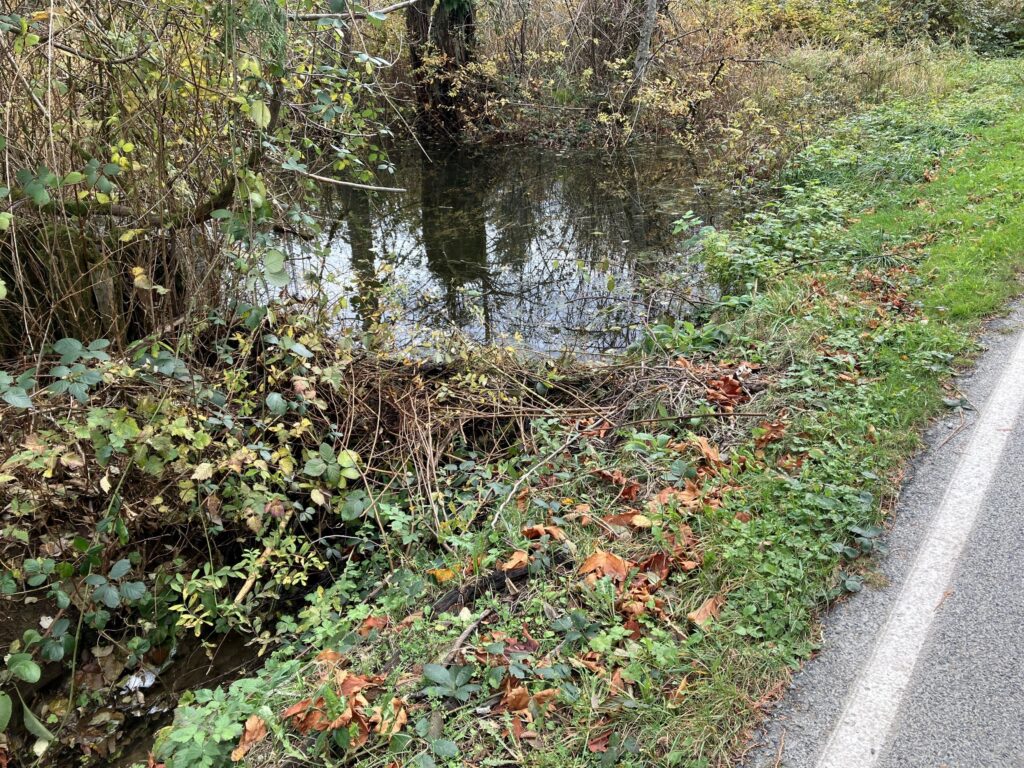
Okay, you have identified a beaver-human conflict site that involves a plugged culvert.
A Stan’s Beaver Baffler is recommended because of advantages described in the How and Why section when compared to flow-pipe devices.
Materials needed for installation include only 3 readily available items, galvanized livestock panels, steel T-posts, and fence clips or rebar tie-wire.
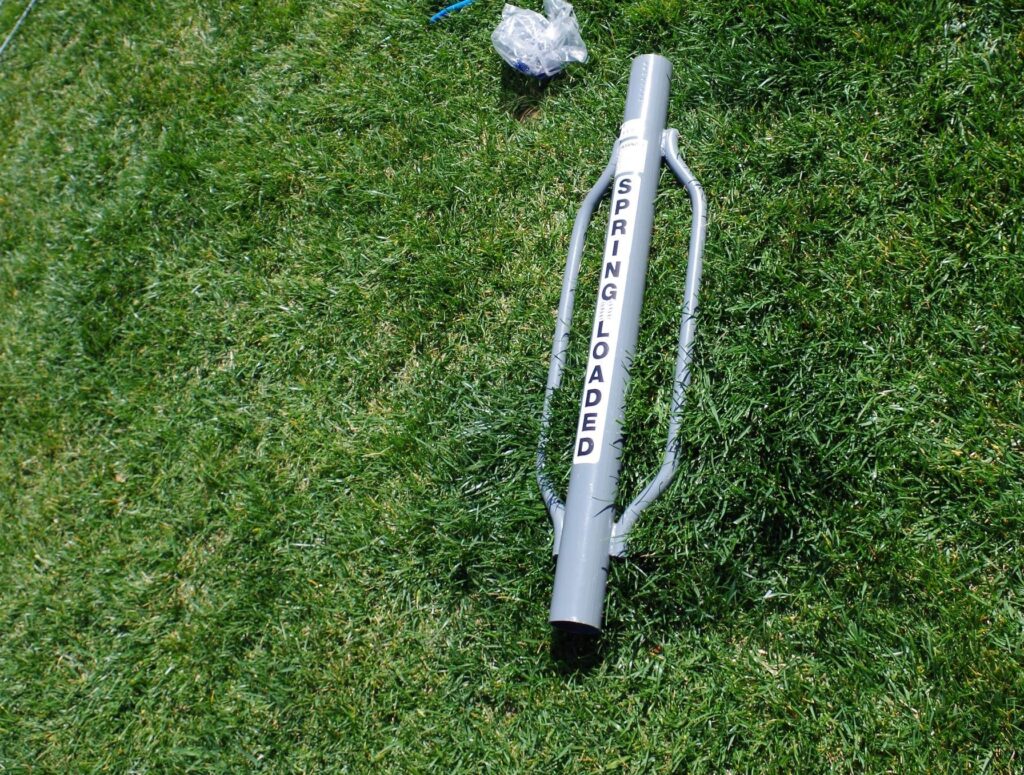
Tools needed for installation include only 4 tools, T-post driver, medium 24” bolt cutters, fencing pliers, and a custom wire bender.
Eight steps for successful SBB installation.
Installing a SBB can be easy if it is treated as a series of steps from site plan creation to monitoring results. The described steps include useful installation tips and potential problems to avoid.
Step 1. Project planning.
Step 2. Estimating material needs and costs.
Step 3. Transporting livestock panels.
Step 4. Creating the integral skirt.
Step 5. Installing T-Posts.
Step 6. Connecting panels.
Step 7. Attaching panels to T-Posts.
Step 8. Monitoring and Maintenance.
.

.
.
.
Step 1. Project planning – this step includes three phases:
Phase one-Describing the problem
Phase two -Project proposal
Phase three- Obtain permits and approvals.
Phase one-Describing the problem. includes location, ownership, and why it is a problem. Briefly describe the problem that is being addressed. What values are being impacted.
Phase two- Project proposal. Important items to include for all projects.
Location of the project site
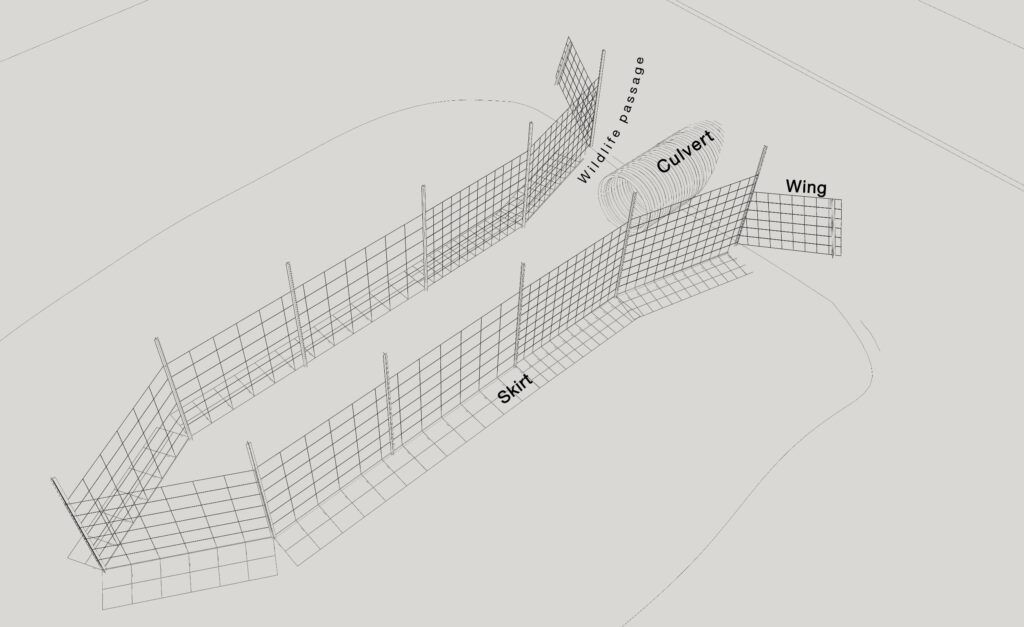
Describe Key features of structure to be installed:
- Location, orientation, length, and shape of structure
- Installation in 1-2 feet of water
- Integral skirt of 8-14-inches
- Wildlife and fish passage provided
- Metal T-posts utilized to hold fence upright
- Fence materials to be utilized
Mitigations being taken during and after installation
Monitoring of installation being proposed
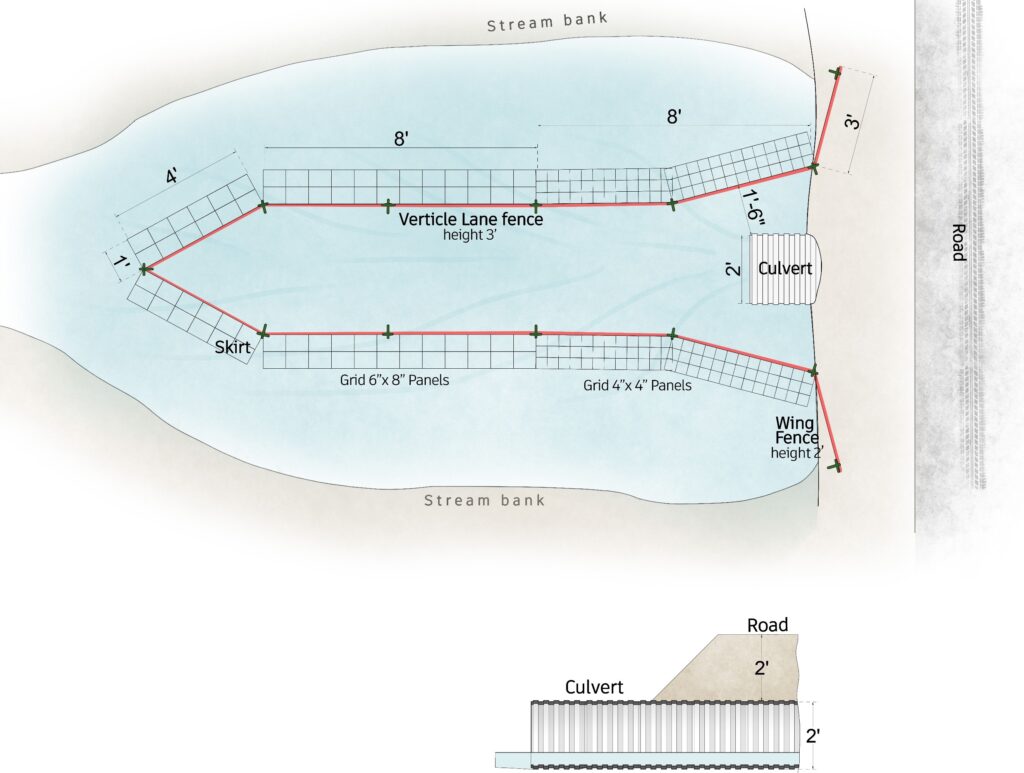
A site map is needed to assist in determining the location and materials needed. The detail of the site map will vary, it can be a detailed computer drawing or a pencil sketch, depending on internal needs and external agency requirements.
.

.
Phase three- Obtain any needed permits. Obtaining needed permits can be frustrating if not planned for early on in the project development. Most county, state, and federal regulators are also frustrated when someone submits a proposal that cannot be approved as designed. They prefer to be involved early in the design process to share potential concerns and solutions to resolve beaver conflicts while protecting other important resources.
Some preliminary information needs to be obtained prior to initially contacting regulatory agencies such as site location, known fishery occurrence, and potential solutions being considered. A preliminary sketch of site showing existing extent of flooded area and pond depth compared to proposed extent of retained pond area and water depth can be useful in evaluating impacts.
.
.
.
.
Step 2. What is the material cost for a typical SBB?
Materials needed to install a SBB structure cost between $180 and $300 in July of 2024. This compares to an estimated materials cost of between $800 and $1,600 to install a fence and 20-40 foot 15-inch flow-pipe with remote intake.
.
.
.
.
Step 3. Transporting livestock panels
When purchased, livestock panels typically come in 16-foot lengths. Cutting each 16-foot panel into two approximate 8-foot panels, with 4” prongs created on each panel, will make it easier to transport the panels. The prongs that are created on each shorter panel will be used to securely connect the panels during installation of the Stan’s Beaver Baffler fence.
Note: Creating two 6″x8″ grid panels with 4-inch prongs on each panel will result in 8’4” and 7’8” panels from the original 16’ panel.
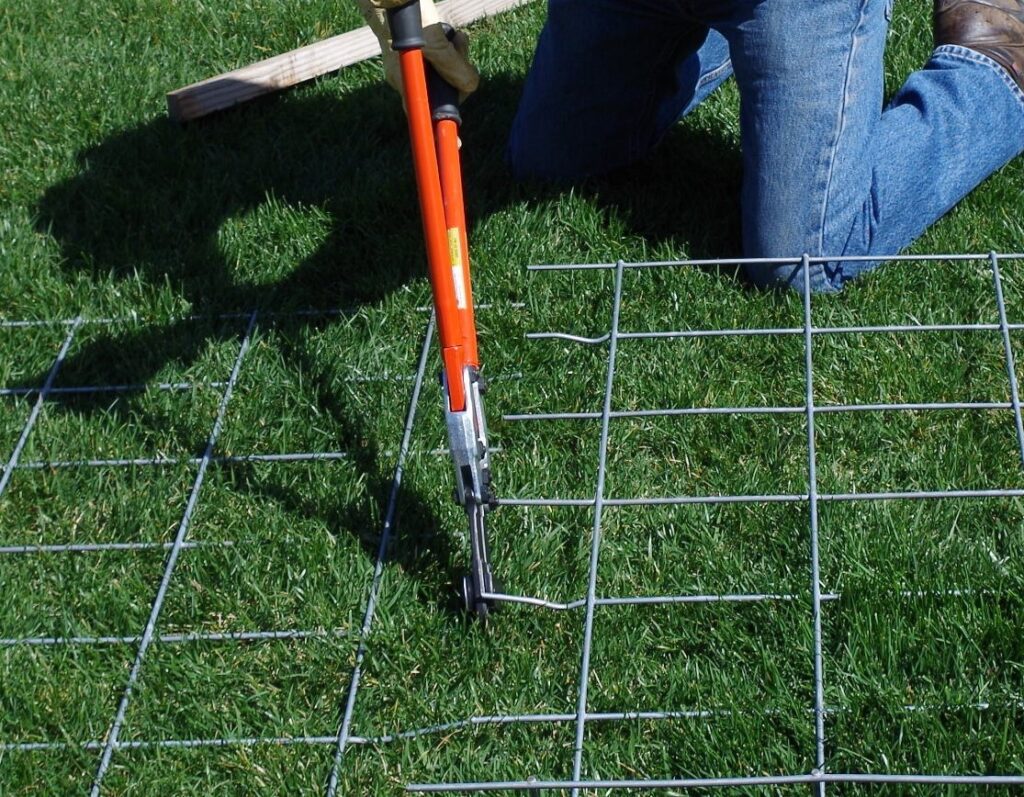

8-foot panels with 4” prongs on each panel. Cut the panels leaving a 4-inch
prong alternately on each of the smaller 8-foot panels.
Note: cutting the panels with bolt cutters is difficult if the panels are laying flat on the ground. Elevating the panels on a 2×4 board or T-post allows the bolt cutters to be more effective and easier to cut the panel wires.
.
.
.
.
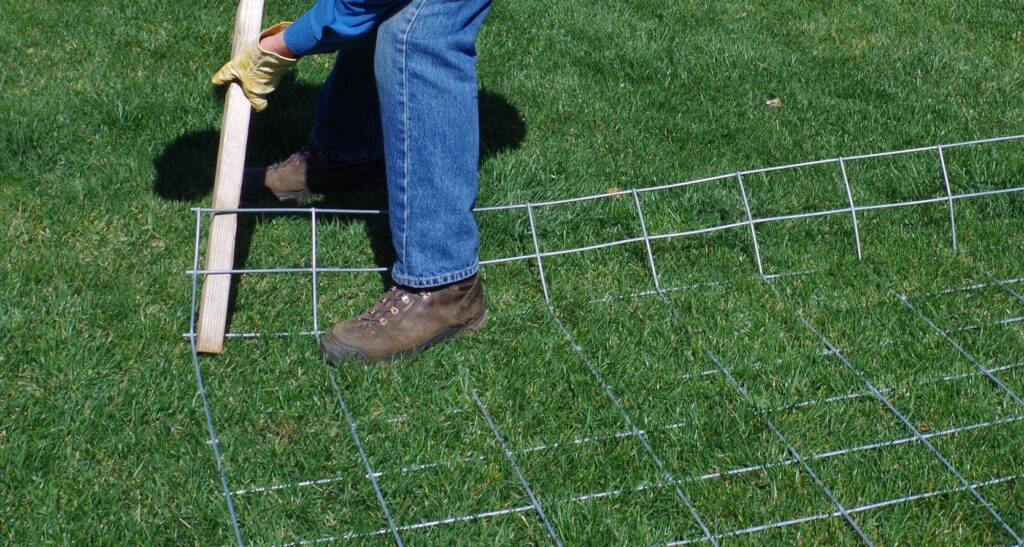
Step 4. Creating a skirt for the fence.
The integral 8”-14” skirt reduces the chance that a beaver will burrow under the fence and attempt to rebuild a dam.
The skirt is created on the bottom of the livestock panel. The bottom two rows of the livestock cattle panel are spaced 4” or 6” apart and the rest of the panel has 6” horizontal spacings. Use a 4-foot piece of 2×4 lumber to bend the bottom 2-3 rows of the panel upwards. Insert the 2×4 under the lower 2 wires and above the 3rd wire and pry up creating a 60-70 degree angle, along the entire bottom of the panel. The skirt is created with less than a 90 degree angle in a manner that when installed a spring effect is created that holds the skirt to the bottom of the pond. The spring effect is created by the installer standing on the skirt while it is being attached to the post.
Note: When installed, the prongs of each panel should be pointed up stream to connect to the next panel with the skirt on the outside of lane. This requires the creation of panels with ½ having skirts on the right and ½ on the left side when installed and prongs pointed upstream. If all panels are made with prongs on the same end, the prong end can be reversed by removing the outside wire of the non-prong end to create prongs on both ends.

.
.
.
.
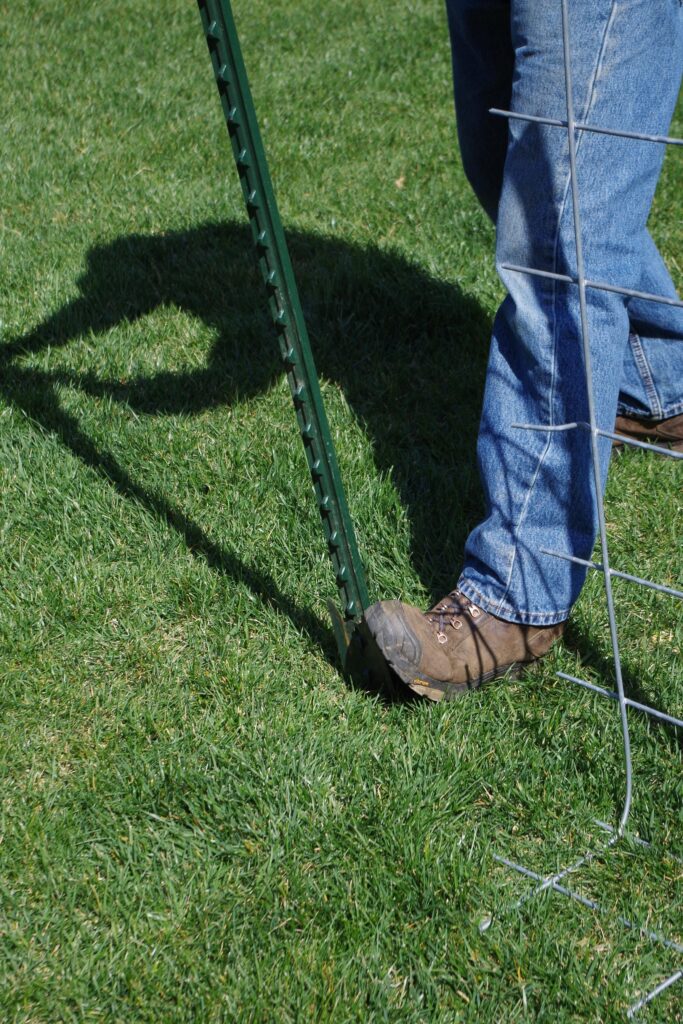
Step 5. Installing T-posts
A 5.5-foot metal T-post installed with a driver is safer than using a ladder and sledgehammer to install wooden posts.
T-Posts are designed with small protrusions that are about 1.5” apart on the “Top – T” side of the T-Post. The protrusions serve to prevent wire from sliding up or down the T-Post if an animal tries to force its way between wires. Unfortunately, the protrusions will push a welded livestock panel away from the T-Post, making it difficult to attach the panel to the T-Post using standard fence clips or chainlink T-Post fence clips.

Place T-posts approximately 4-5 – feet apart. The fence does not need to be in a straight line and minor curves or meanders will not adversely impact the Stan’s Beaver Baffler’s ability to function properly.
.
.
.
.
.
.
Step 6. Connect panels together
Each panel will have an end with a series of 4-inch prongs that was created when the original 16-foot livestock panel was cut to create two eight-foot panels. The panel end with the prongs is oriented upstream when attached to the T-posts with skirt on the outside.
Connect the second panel to the first panel by overlapping the prongs. Then using the wire bender tool or fence pliers to twist the prongs of the first panel snugly around the second panel vertical wire. A very strong connection is made with this technique. It is important to wrap the prong in the direction which includes its vertical wire and not away from its vertical wire that may result in broken welds.


Video
Connecting Panels
.
.
.
.
Step 7. Attach panels to T-posts
It is important to make a good fit of the fence panel to the floor of the pond. Beavers occasionally will work their way under the fence if there is a gap. A large rock or log may require using bolt cutters to make a notch in the fence and skirt to create a good fit.
Each 8-foot panel will be attached to two T-posts.
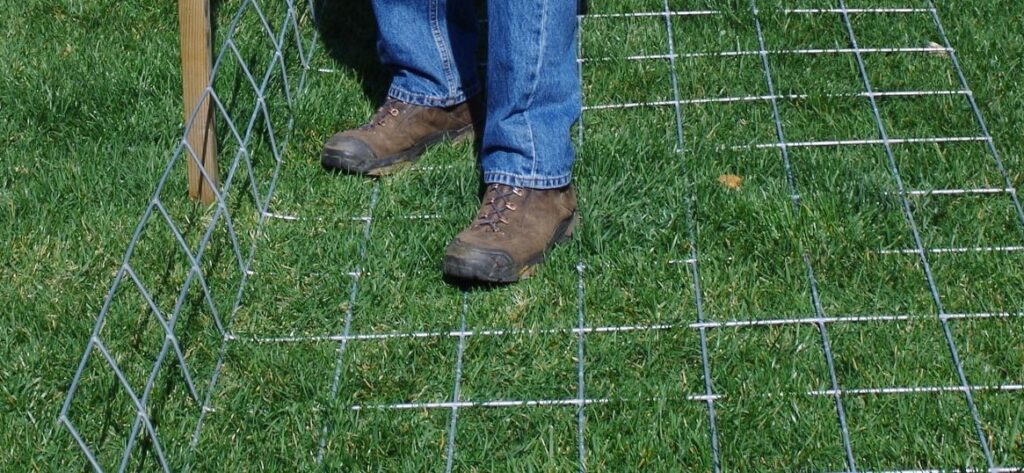
When the panel is initially placed against the T-post the bend that creates the integral skirt will be 2-3” off of the pond floor due to the spring effect of the 70 – 80-degree angle. This is intentional as the skirt being at a 70-degree angle will create the spring effect when stepped on and pushed to the pond floor when connecting a panel to the T-post.

Step on skirt adjacent to the T-post to make a tight fit to the pond bottom when attaching a panel to T-post. This will result in a tight spring loaded fit to the bottom of the pond.
Attach the panel to each T-post using 3-4 fence clips or wire ties.
Note: Do not use zip-ties as they will often deteriorate in 2-3 years, sometimes earlier.

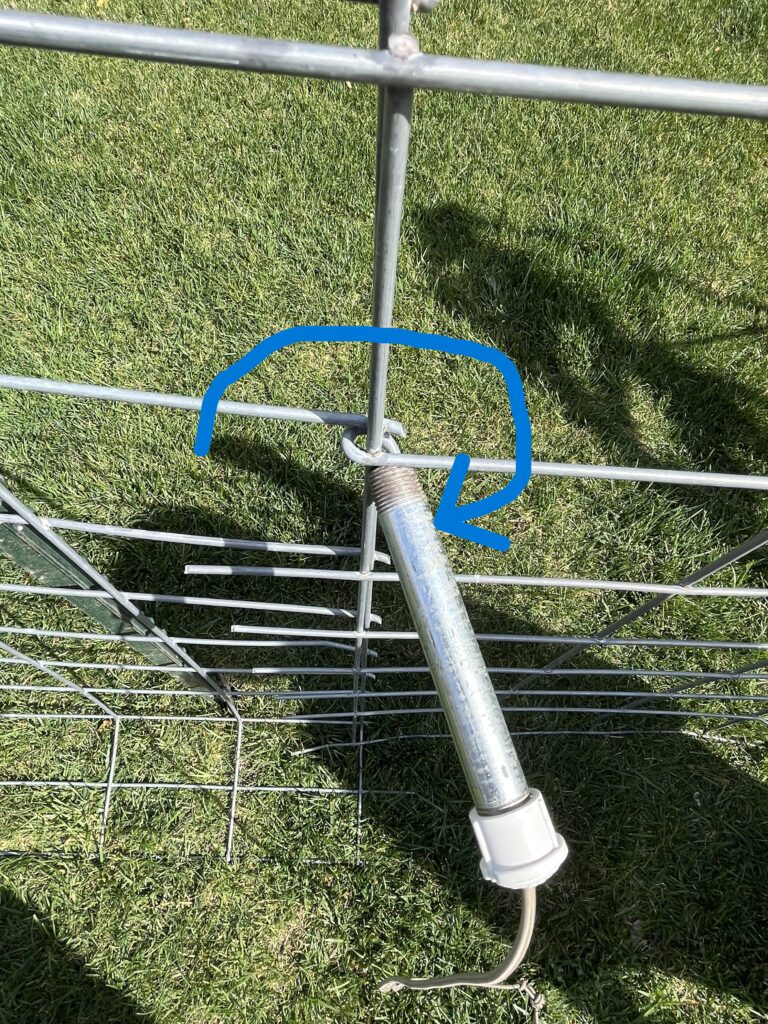
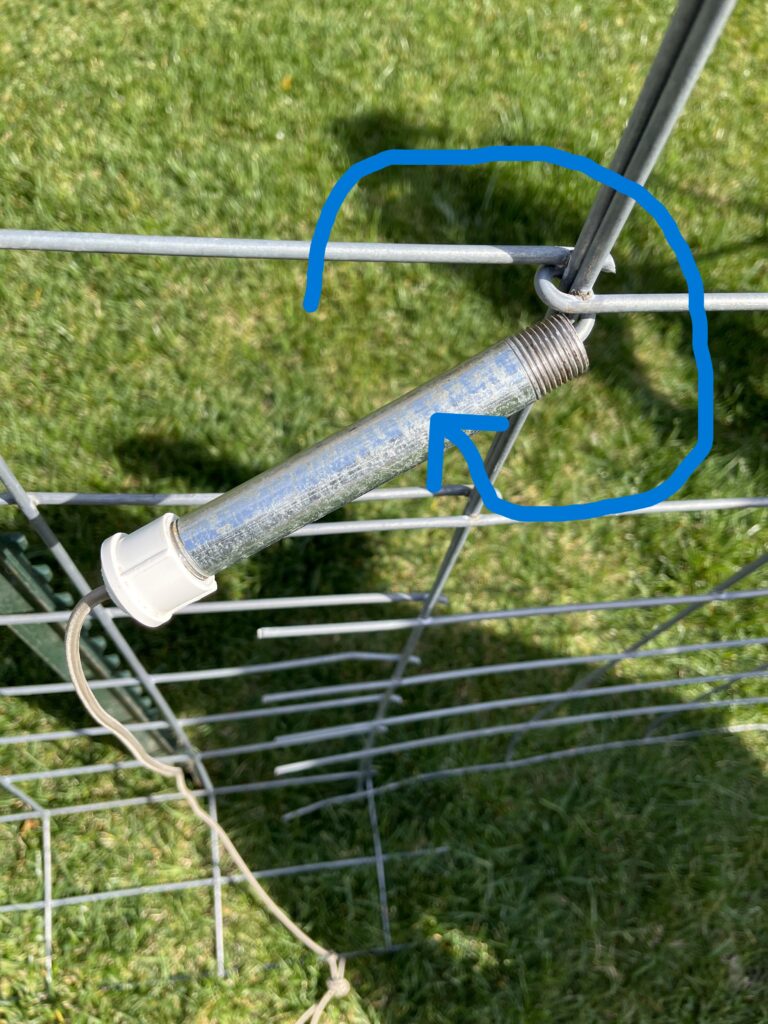
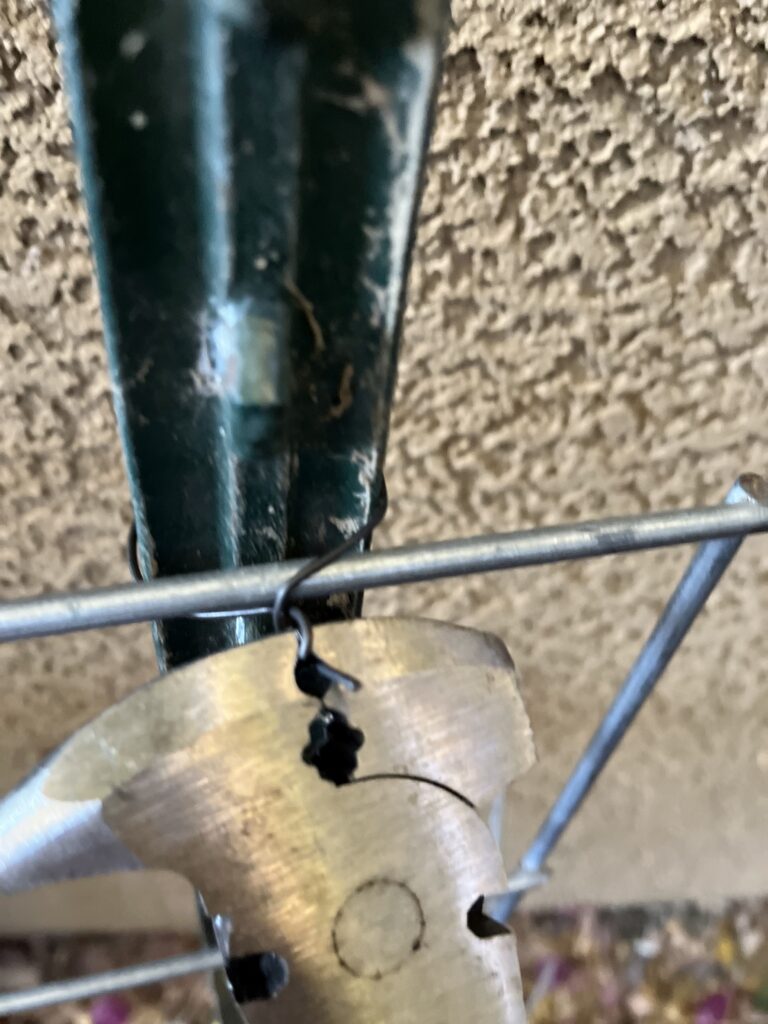
Using rebar tie-wire to attach fence panel to T-post
Attaching panels using standard 16-gauge rebar tie-wire is probably the most common technique used to attach fence panels to T-posts. The wire is readily available, inexpensive, and easy to cut to desired lengths. Attaching a panel to the T-post is done by cutting a 6-8” length of tie-wire and then wrapping the wire around both the panel and T-post. This can be done by hand. Fencing pliers will make a tighter connection that is firm.
Advantages include that rebar tie-wire is readily available and inexpensive. No special tools are needed.
Potential problems are the wire is not as durable as fence clips. An additional disadvantage is that the process is often slower than fence clips.
Cost about 2 cents each tie and no special equipment is needed.

.
.
.
.
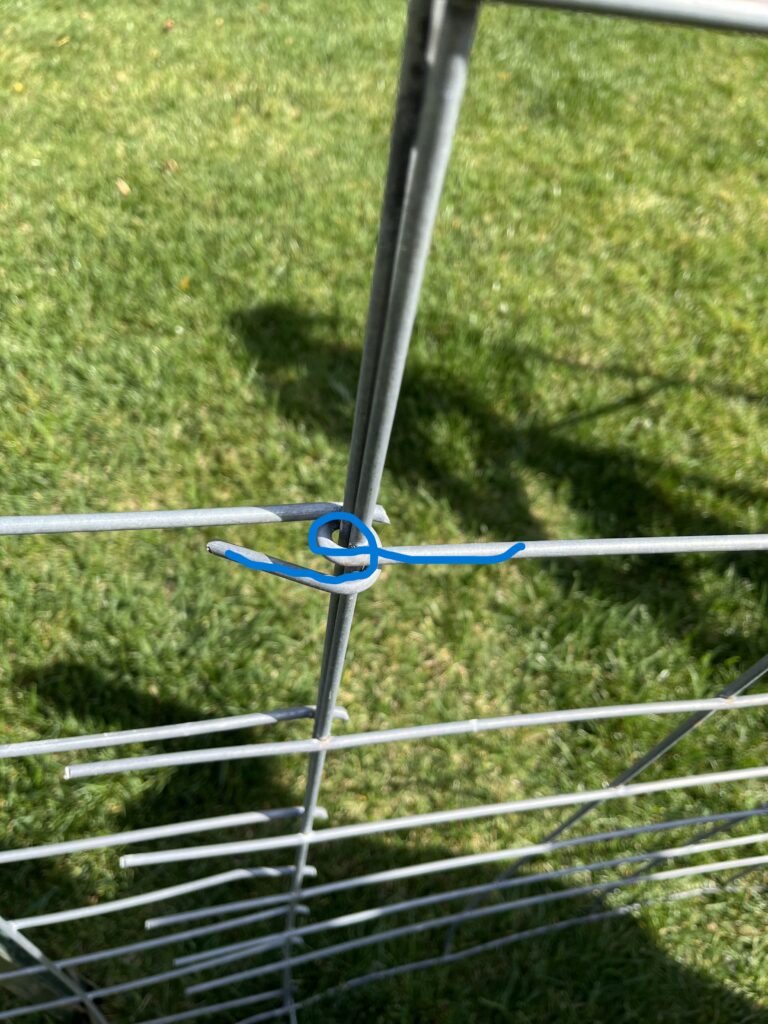
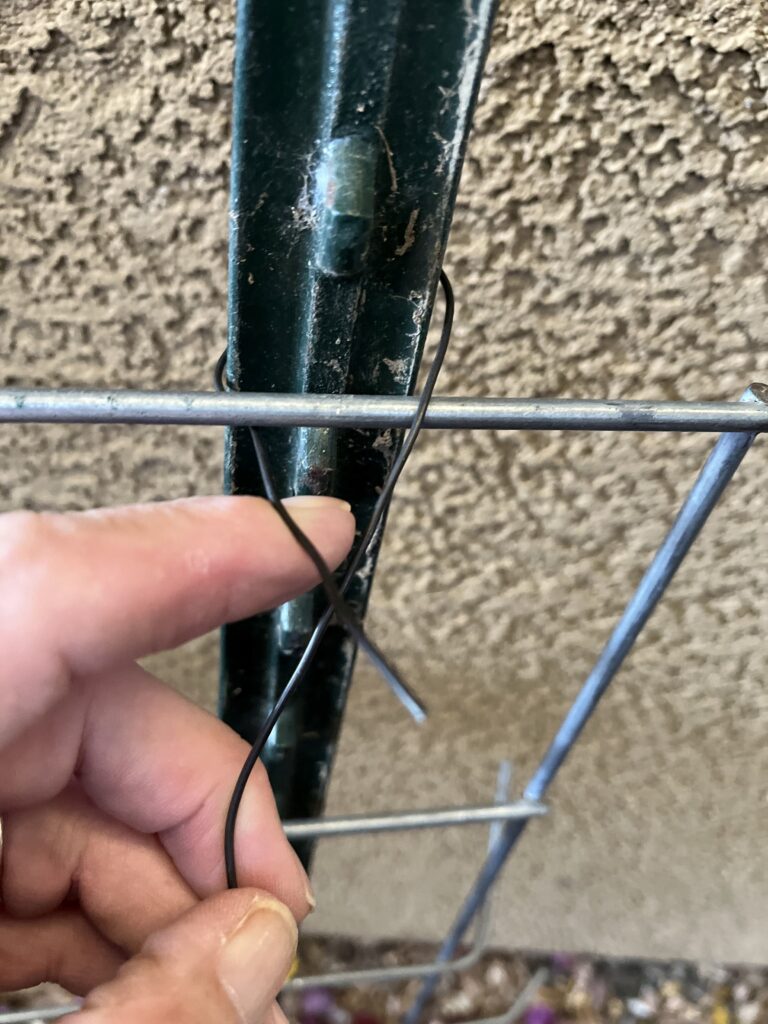
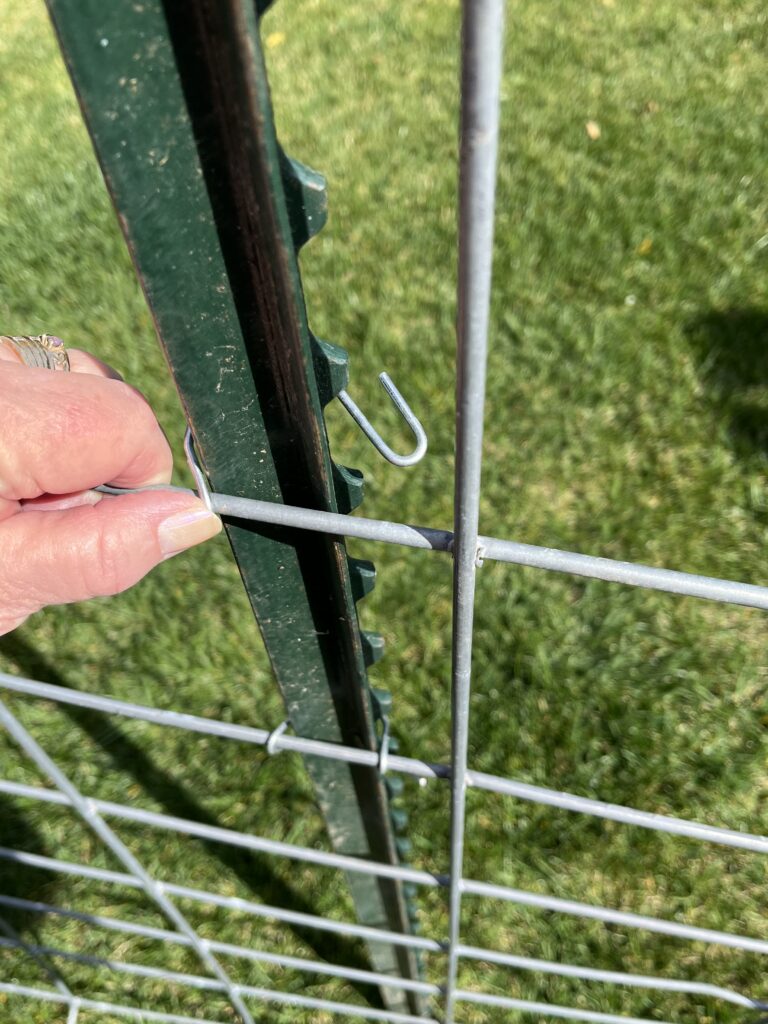
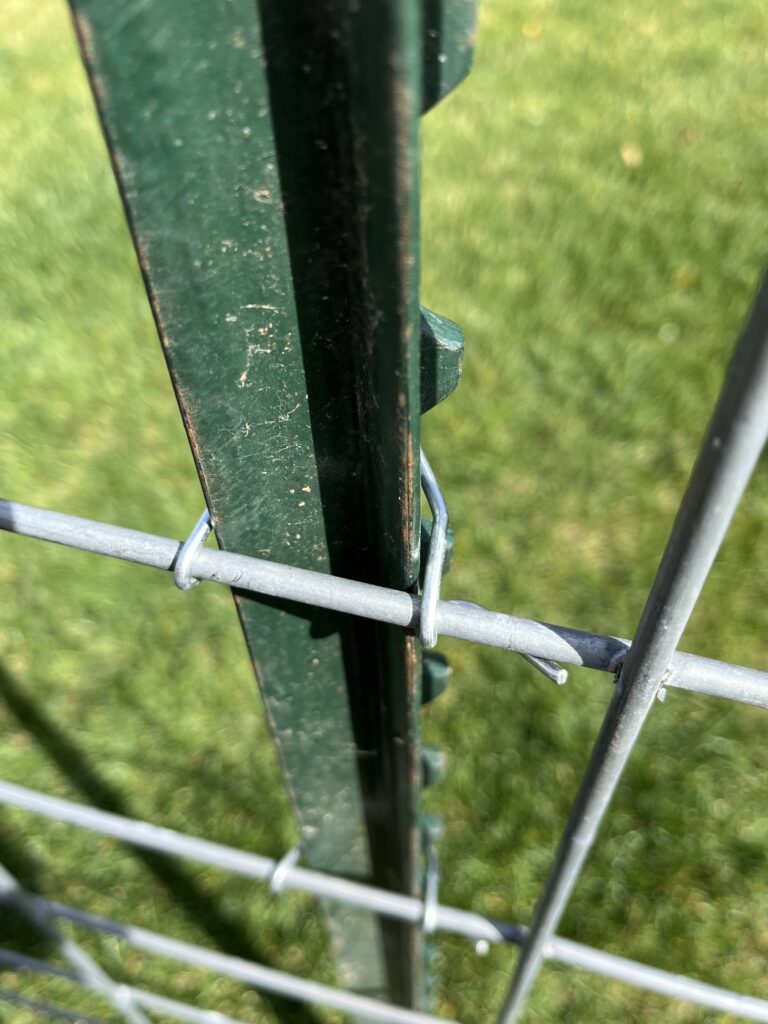
Using fence clips to attach fence panel to T-post
Fence clips are much stronger and more durable than rebar tie wire. Attach one end of fence clip to a horizontal panel wire. Pull the clip around the post and attach clip to the wire on the other side of the post. Finally twist the clip ends around the horizontal fence wire using a screwdriver or fencing pliers.
Advantages include Fence clips are readily available and provide the strongest attachment.
Potential problems Heavy 4 or 6 gauge galvanized livestock panels are stiff and not at all flexible. The standard T-post fence clip is designed to attach barbed wire or smaller 10-12 gauge fence wire to a T-post that is oriented flat to the wire. If the T-post is twisted, then 2 clips may need to be spliced together to wrap the clip around the post and attached to the heavy gauge livestock panel wire on both sides of the post. Fencing pliers are needed to firmly attach the clip.
T-Posts have small protrusions used for wire fences that can interfere with attaching the fence clip. The protrusions can be avoided by rotating the T-Post 60 degrees from the normal when installing the T-Post. (see step 5 Installing T-Posts.)
Cost about 10 cents for each clip. Some stores include 3-4 fence clips at no additional cost with each T-post sold.
wire then around T-post.

side of T-post

using screwdriver or fence pliers
Video
Installing fence clip
.
.
.
.
Step 8. Monitoring
Monitoring and maintenance is the last step of the installation process. A detailed discussion of the monitoring process with an example monitoring plan is included as a separate section of the website. Monitoring Stan’s Beaver Baffler Installations